Hey everyone, welcome to my recipe page, looking for the perfect All Natural San Francisco Sourdough Bread recipe? look no further! We provide you only the perfect All Natural San Francisco Sourdough Bread recipe here. We also have wide variety of recipes to try.
Before you jump to All Natural San Francisco Sourdough Bread recipe, you may want to read this short interesting healthy tips about Foods That Can Make You Happy.
A lot of us think that comfort foods are not good for us and that we need to stay away from them. At times, if the comfort food is a sugary food or some other junk food, this is very true. At times, comfort foods can be very nourishing and good for us to eat. There are several foods that actually can boost your moods when you eat them. If you seem to be a little bit down and you’re needing an emotional pick me up, try a number of these.
Green tea is truly excellent for your mood. You were just anticipating to read that, weren’t you? Green tea is chock-full of an amino acid called L-theanine. Studies have found that this amino acid essentially stimulates brain waves. This will better your brain’s concentration while at the same loosening up the rest of your body. You knew that green tea helps you be better. Now you are aware that green tea helps you to raise your moods too!
Now you can see that junk food isn’t necessarily what you should eat when you wish to help your moods get better. Try several of these instead!
We hope you got insight from reading it, now let’s go back to all natural san francisco sourdough bread recipe. To cook all natural san francisco sourdough bread you only need 10 ingredients and 10 steps. Here is how you do it.
The ingredients needed to make All Natural San Francisco Sourdough Bread:
- You need Phase One
- Provide 1/2 cup whole wheat flour
- Get 1/2 cup water
- Use Phase two
- Provide 200 g water
- Get 120 g sourdough starter
- Provide 236 g whole wheat flour
- Use Phase Three
- Get 400 g Whole Wheat flour
- Take 100 g Buckwheat Flour
Instructions to make All Natural San Francisco Sourdough Bread:
- Combine Phase One ingredients in a mason jar or a small dish. You need to leave a little room at the top for it to expand. Stir up this flour goo and set it aside in a warm place.
- Over the next few days, this goo should start to bubble a little. Just check in every so often and see what it looks like. If it starts to bubble, or if it separates, with a layer of kinda gross looking water at the top, add a little more flour and water and stir it up again. Some sources recommend feeding every 12 hours, and I guess this is ideal. But that type of setup stresses me out, so I just feed it when it looks hungry.
- Depending on where you live, within a week or so (in San Francisco it can happen in a few days, but we're obviously known for our sourdough) you should find that, when you add flour and water to the mix, it can almost double in volume within a couple of hours. This means your starter is ready to go!
- Now, to make a loaf of bread, you combine Phase Two ingredients in a large bowl. Mix well. Cover with a kitchen towel and wait for about 12 hours. I like to do this in the evening so I can do the next step when I wake up in the morning. Once you have your dough fermented, continue with step 7. The next 2 steps are just some pointers on maintaining a natural starter.
- Any remaining starter from mixing your dough can be kept alive with a fresh helping of flour and water mix. Also, at any point in this process before you bake your bread, the dough should contain some of the yeast you've captured in your starter. That means you can always save some portion of this dough as a future starter. Give it away to friends or use it to replenish your own stash. Just feed it regularly, every couple of days or so.
- If you won't be using your starter for awhile, you can put it in the fridge. In this case, you only need to feed it maybe once a week. For more long term storage, wait until it's particularly bubbly and active, then spread it out on a sheet of parchment and let it dry to a crisp. Then, break up the chunks and store in a dark, airtight location. When you want to use it, just mix some of these flakes with some flour and water paste again and wait until it wakes up.
- So, continuing with step 4 above, just combine the ingredients listed in Phase Three with your fermented dough. Knead them together until you have a nice ball of dough. Put this in a bowl, cover it with plastic, and let it sit in the refrigerator for 24 hours. Note: Feel free to experiment with different flours. I used a combo of these two because I had them in my kitchen.
- When the 24 hours is up, take your fermented dough out of the fridge. Knead it just a bit to form it into a smooth ball. Pinch the seams together gently to seal them up. Set your dough ball in a warm spot with a towel over it and just let it be for about 5 hours or so. Feel free to use any other kinds of fancy bread-shaping techniques here if you know them.
- Time to bake. Heat your oven to about 450f. On the top rack, a pizza stone is ideal. On the bottom rack, a cast iron pan or an oven-proof pan you don't really care about.
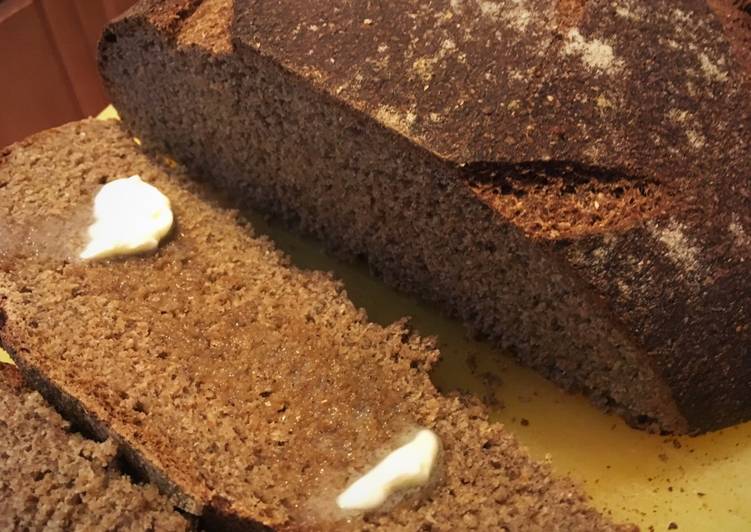
- Give your loaf a light dusting of flour, slice into the top about 1/4" in a few spots so that steam will escape as it bakes, and slide it onto the hot stone. Carefully pour a cup or so of water into the pan on the bottom rack and shut the oven door. Bake for about 45 minutes. When done, your bread should give a hollow knock when thumped.
If you find this All Natural San Francisco Sourdough Bread recipe valuable please share it to your close friends or family, thank you and good luck.